


Profitable Renko Strategy – Build your account, brick by brick
The profit Renko strategy is designed to eliminate a lot of market noise generated by standard candlestick charts. If you are tired of using old Japanese candlestick charts, we would recommend you Renko charts. By using the Renko chart, we remove the time factor and focus only on the price that isolates the trend.
If this is your first time on our site, our team at Trading Strategy Guide welcomes you. Make sure you hit the subscribe button so you get Free Trading Strategies every week straight to your email.

When you are actively trading the markets (open trading, day trading), it is important to have a method to remove market noise. The Renko trading strategy is independent of time and gives you an eccentric way to see price action.
While free Renko charts can be used on different asset classes, including cryptocurrencies, our simple Renko system is designed, but not limited to, to be used in Forex market.
In this trading guide we will teach you what a Renko chart is, how to use a live Renko chart in your trading, and how to optimize Renko tile size.
What is a Renko chart?
A Renko chart is a technical tool or a type of chart built using only price data. Unlike Japanese candlestick charts, which are built using price, time and volume, Renko charts only measure price movement.
Renko has no time dimension.
See below, what a typical Renko chart looks like:
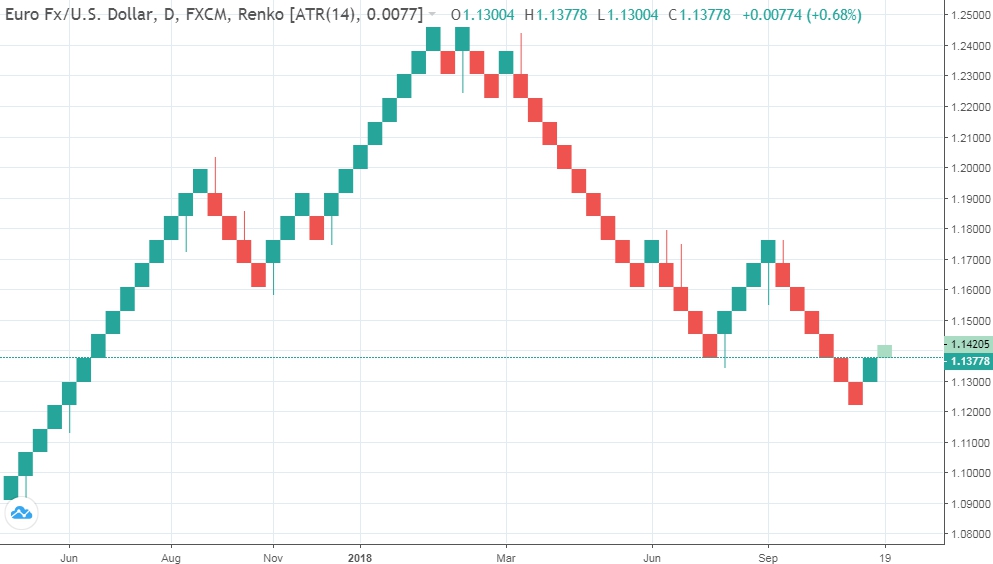
Renko charts are not some well-kept secret from feudal Japan as some trading experts want you to believe. The Renko bar was actually developed several decades ago.
The name Renko means brick in Japanese and comes from the word Renga. The T hese chart is sometimes referred to as a tile chart by traders.
Steve Nison, the father of modern candlestick charts is the one who actually created the Renko charts that are known to the public. These charts are often compared to traditional candlesticks but there are some key differences. While the candlestick charts have different lengths of transparent Wicks lines, the Renko bricks are all the same size.
The simple bricks found in the Renko chart make it easier to read the market and make quick decisions. These charts are ideal for day traders, although traders can use any timeframe. By removing the noisier parts of candlestick charts that apply to long-term trading strategies, Renko charts allow to identify where the market is actually moving.
See below the difference between popular Japanese candlestick chart and live Renko chart:
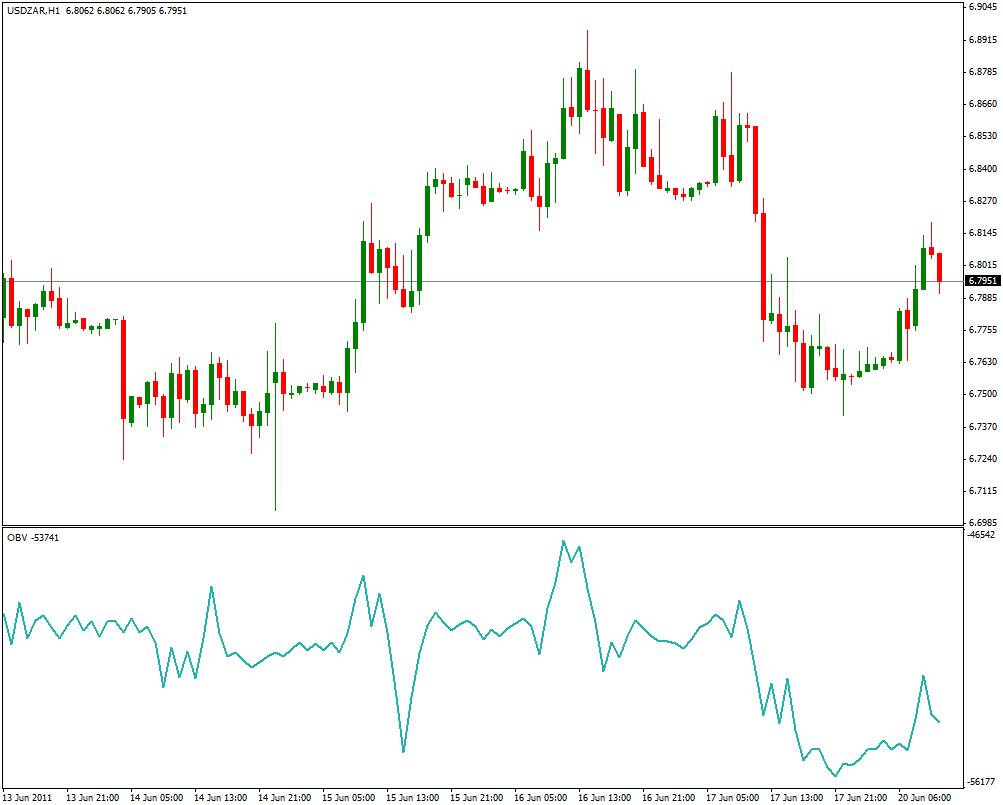
The difference between the two chart types is pretty obvious. Renko charts do a much better job of smoothing price action.
Let’s take a step forward and find out how Renko tiles are formed.
To use Renko strategy profitablyyou really need to understand the basic foundation of Renko block
Each candle on the Renko chart is called a brick because it has the shape of a building brick. The rectangular bricks used to build the wall are of the same size. The same goes for Renko charts; Each brick is the same size. The size of a Renko brick is predefined by the user.
How to read and build Renko . trading charts
Reading Renko charts is very simple. Because the bricks have a fixed size, they can all easily be compared with each other. The color (and direction) of the Renko tile will change after the previous tile’s value is exceeded. This shows traders that trends are changing and prices are likely to move in the opposite direction.
Each brick represents a price range (for example – $0.25). However, while the bricks are the same size in the same chart, they can be tailored to your trading goals. Individuals opening and holding longer, high cap positions will use different tile sizes than penny stock traders .
We recommend using the average true average range or, ATR for brevity to build each brick. The ATR is taken from the closing price of the stock. This means that the Renko chart is a lagging indicator. In the next step we will show you how to read Renko bars.
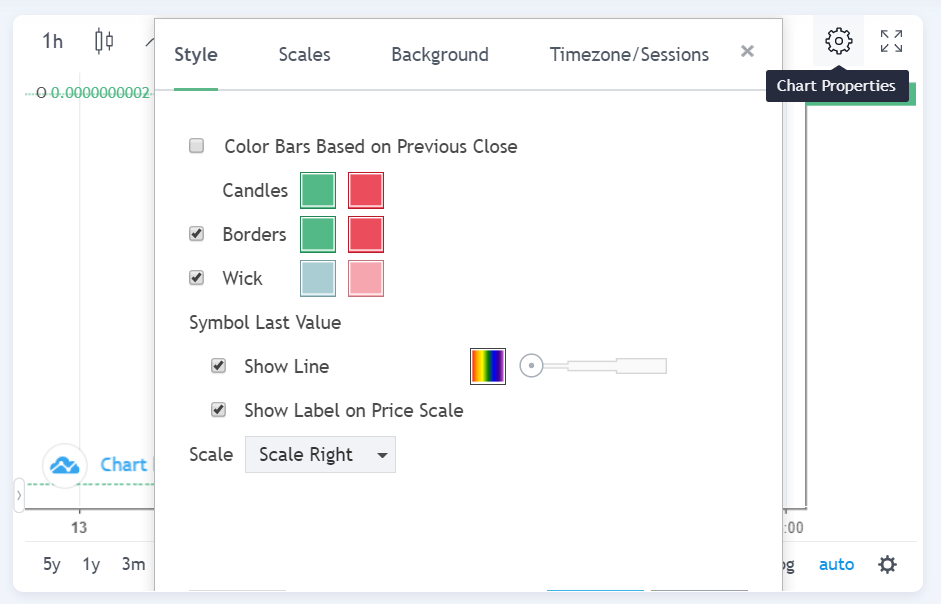
Note #1: if you use Renko bars with wicks or tails, some bricks may display additional wicks at the top or bottom of the brick. But the tile size remains the same.
On the Tradingview charting platform, you can go to Chart Settings – Style – Wick and choose how you want the blocks to be displayed, with or without wicks.
Before going back to wicking Renko bricks, let’s give you the basics or background of a Renko brick.
We have established that the tile size is predefined by the user. If you are trading with Renko charts and your preferred tile size is 20 pips, then bricks only form when the price moves up or down 20 pips.
The best way to illustrate this concept is to look at Renko blocks through the eyes of candlestick charts. In the EUR/USD 5-minute candlestick chart below, we have highlighted areas with 20 pips worth of movement.
A green Renko brick will form only after the price will increase 20 pips. Conversely, a red Renko brick will only form after the price drops 20 pips.
As you can tell, the time interval between each brick is inconsistent.
In our EUR/USD chart example, the time it takes to print one Renko block varies from 20 minutes to 1 hour 45 minutes.
Obviously the Renko is less noisy and cuts a lot of noise between the low swings and the high swings.
Important Note: When you trade with Renko charts, the price needs to move twice the price distance of your tile size for the Renko tiles to change color.
For example, if the tile size is still 20, that means we really need to move 40 pips for a red brick to be printed after we have a green brick.
Let’s go back in a second why some blocks have wicks?
Trading Renko charts with wicks can be a very powerful tool in your trading arsenal. Bricks with wicks give us more clues about the battle between bulls and bears.
Wicks are printed on Renko tiles only when there is a strong attempt to create an inversion (changing the color of the tile from green to red and vice versa), but fails. The wick will show you how many pips it goes in the opposite direction.
Note #3: the wick is printed on the tile only when the price moves in the opposite direction of the previous candle at least equal to the length of the +1 brick size.
Let’s see how you can optimize the Renko block and how to choose the right Renko tile size.
How to choose the right Renko tile size?
If you don’t know what is the right size for a Renko chart, we have a solution.
If we want to read dynamic price through Renko blocks, we can use tile size determined by ATR (Average True Range). Instead of choosing a random tile size, this will give you more precise dynamic support and resistance levels.
The ATR will automatically detect a tile size that is more relevant to the price action.
Note 4: The downside of using an ATR-based Renko chart size is that when the ATR value changes, your Renko bricks are redrawn to reflect the new changes.
When choosing your Renko tile size, ask yourself the following questions:
- What is my goal as a trader?
- What is my time limit? What are transaction costs?
- Am I opening small positions or larger positions?
- Do I consider myself risk-averse or risk-averse?
If you are chasing large, lower-risk positions for longer, then it makes sense to use a larger Renko tile size. On the other hand, if you are chasing high-risk positions that require attention to volatility, smaller bricks are better.
Learn how to trade Renko charts properly.
See below:
Simple Renko system
We will suggest two trading strategies that you can use with Renko blocks. The first simple Renko system is an indicator-based strategy that uses price momentum divergence to identify trend reversals.
Renko trading strategy #1
For this Renko trading strategy , we only need to use the RSI indicator. We want to use a 20 period RSI. So timing is the same as ATR Renko tile size.
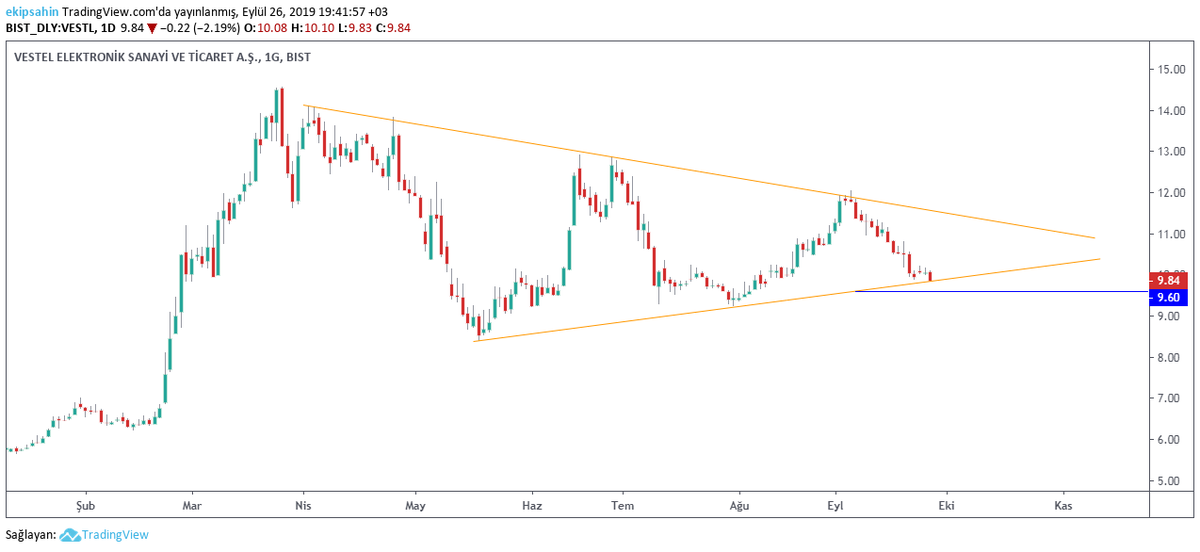
See the extended Renko chart below:

Once we spot a momentum divergence, an entry signal is triggered once we get a reversal. On the Renko chart, a trend reversal is set in motion once the tile changes color. In this case, when we spot a bearish divergence, enter a short position after the brick turns red.
For bullish divergence, wait for the brick to turn green.
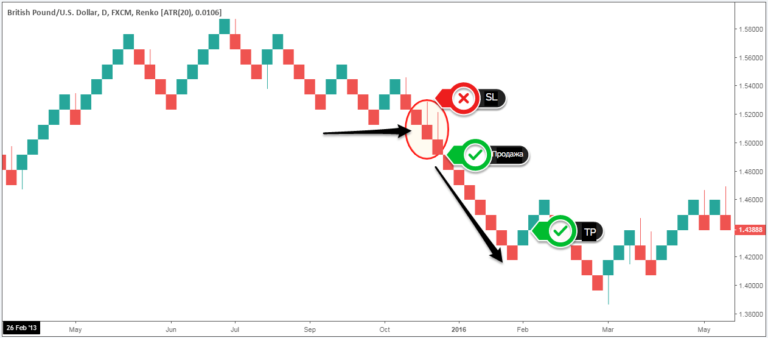
We exit our profitable trade once another reversal pattern is formed in the opposite direction of our trade. As a method to protect our account balance and not lose too much, you can place your SL above and below the pivot point developed after entry.
A lot of the noise inherent in conventional time-based graphs is removed. So if you trade with Renko charts, it will be a lot easier to spot divergences and trend reversals. The RSI is the best indicator to use with Renko.
Renko Trading Strategy #2
Another profitable Renko strategy you can use is to focus only on bricks.
No additional technical tools are required for this system.
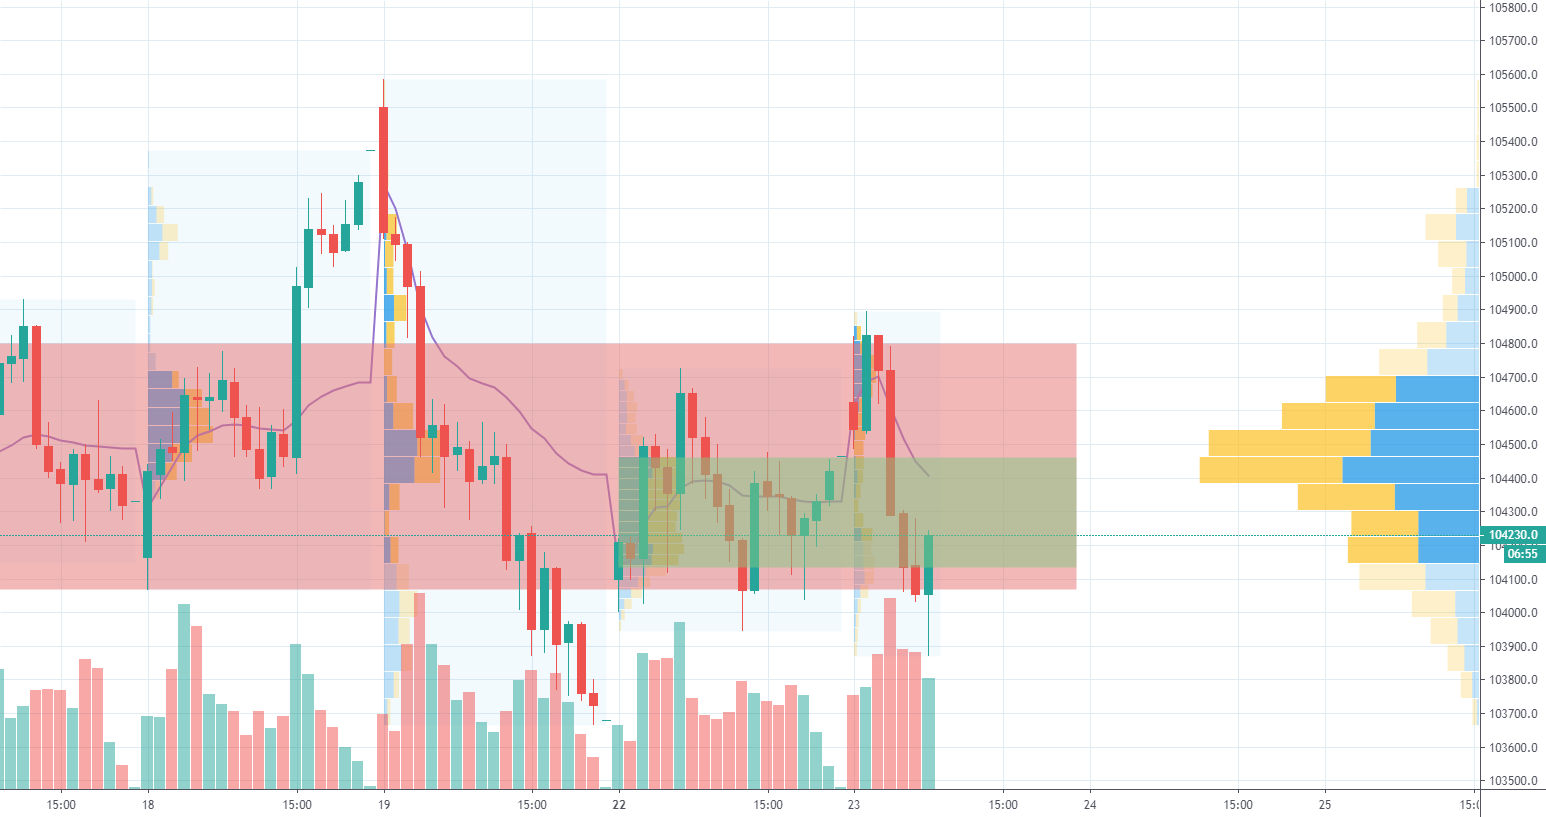
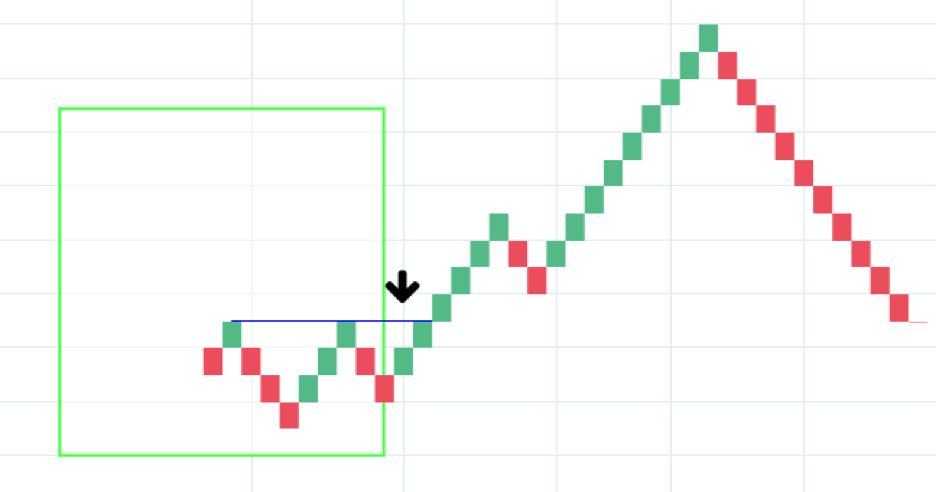
We will explore a very simple but very powerful Renko chart pattern combined with wicks. This Renko Rack pattern looks for two consecutive bricks of the same color and both bricks have wicks.
The position of this Renko pattern doesn’t really matter. It can be at the end or middle of a trend. This pattern has a very high success rate if traded in the right context. You have to look around these two brick patterns and make sure the blocks don’t move back and forth within the transaction range.
If that is not the case, then you have a green light to receive the signal generated by this trade setup.
Conclusion – Renko . Trading Strategy
The Renko bar ensures that you have a cleaner and cleaner representation of the price action. If you’re having trouble reading the price on a candlestick chart, it might be time to look the other way. Trading with our profitable Renko strategy may be right for you.
We strongly believe that the Forex Renko chart is more suitable for traders who are still struggling to analyze candlestick charts. The Renko trading strategies presented through this trading guide are just an introduction to the world of Renko bricks. We hope you now have a clear idea of what the possibilities are using this new charting technique. Don’t forget to read our Chart Pattern Trading Strategy .